Creating Your First Survey
Welcome to SurveyMethods! This guide will walk you through creating your first survey in just a few minutes.
Getting Started
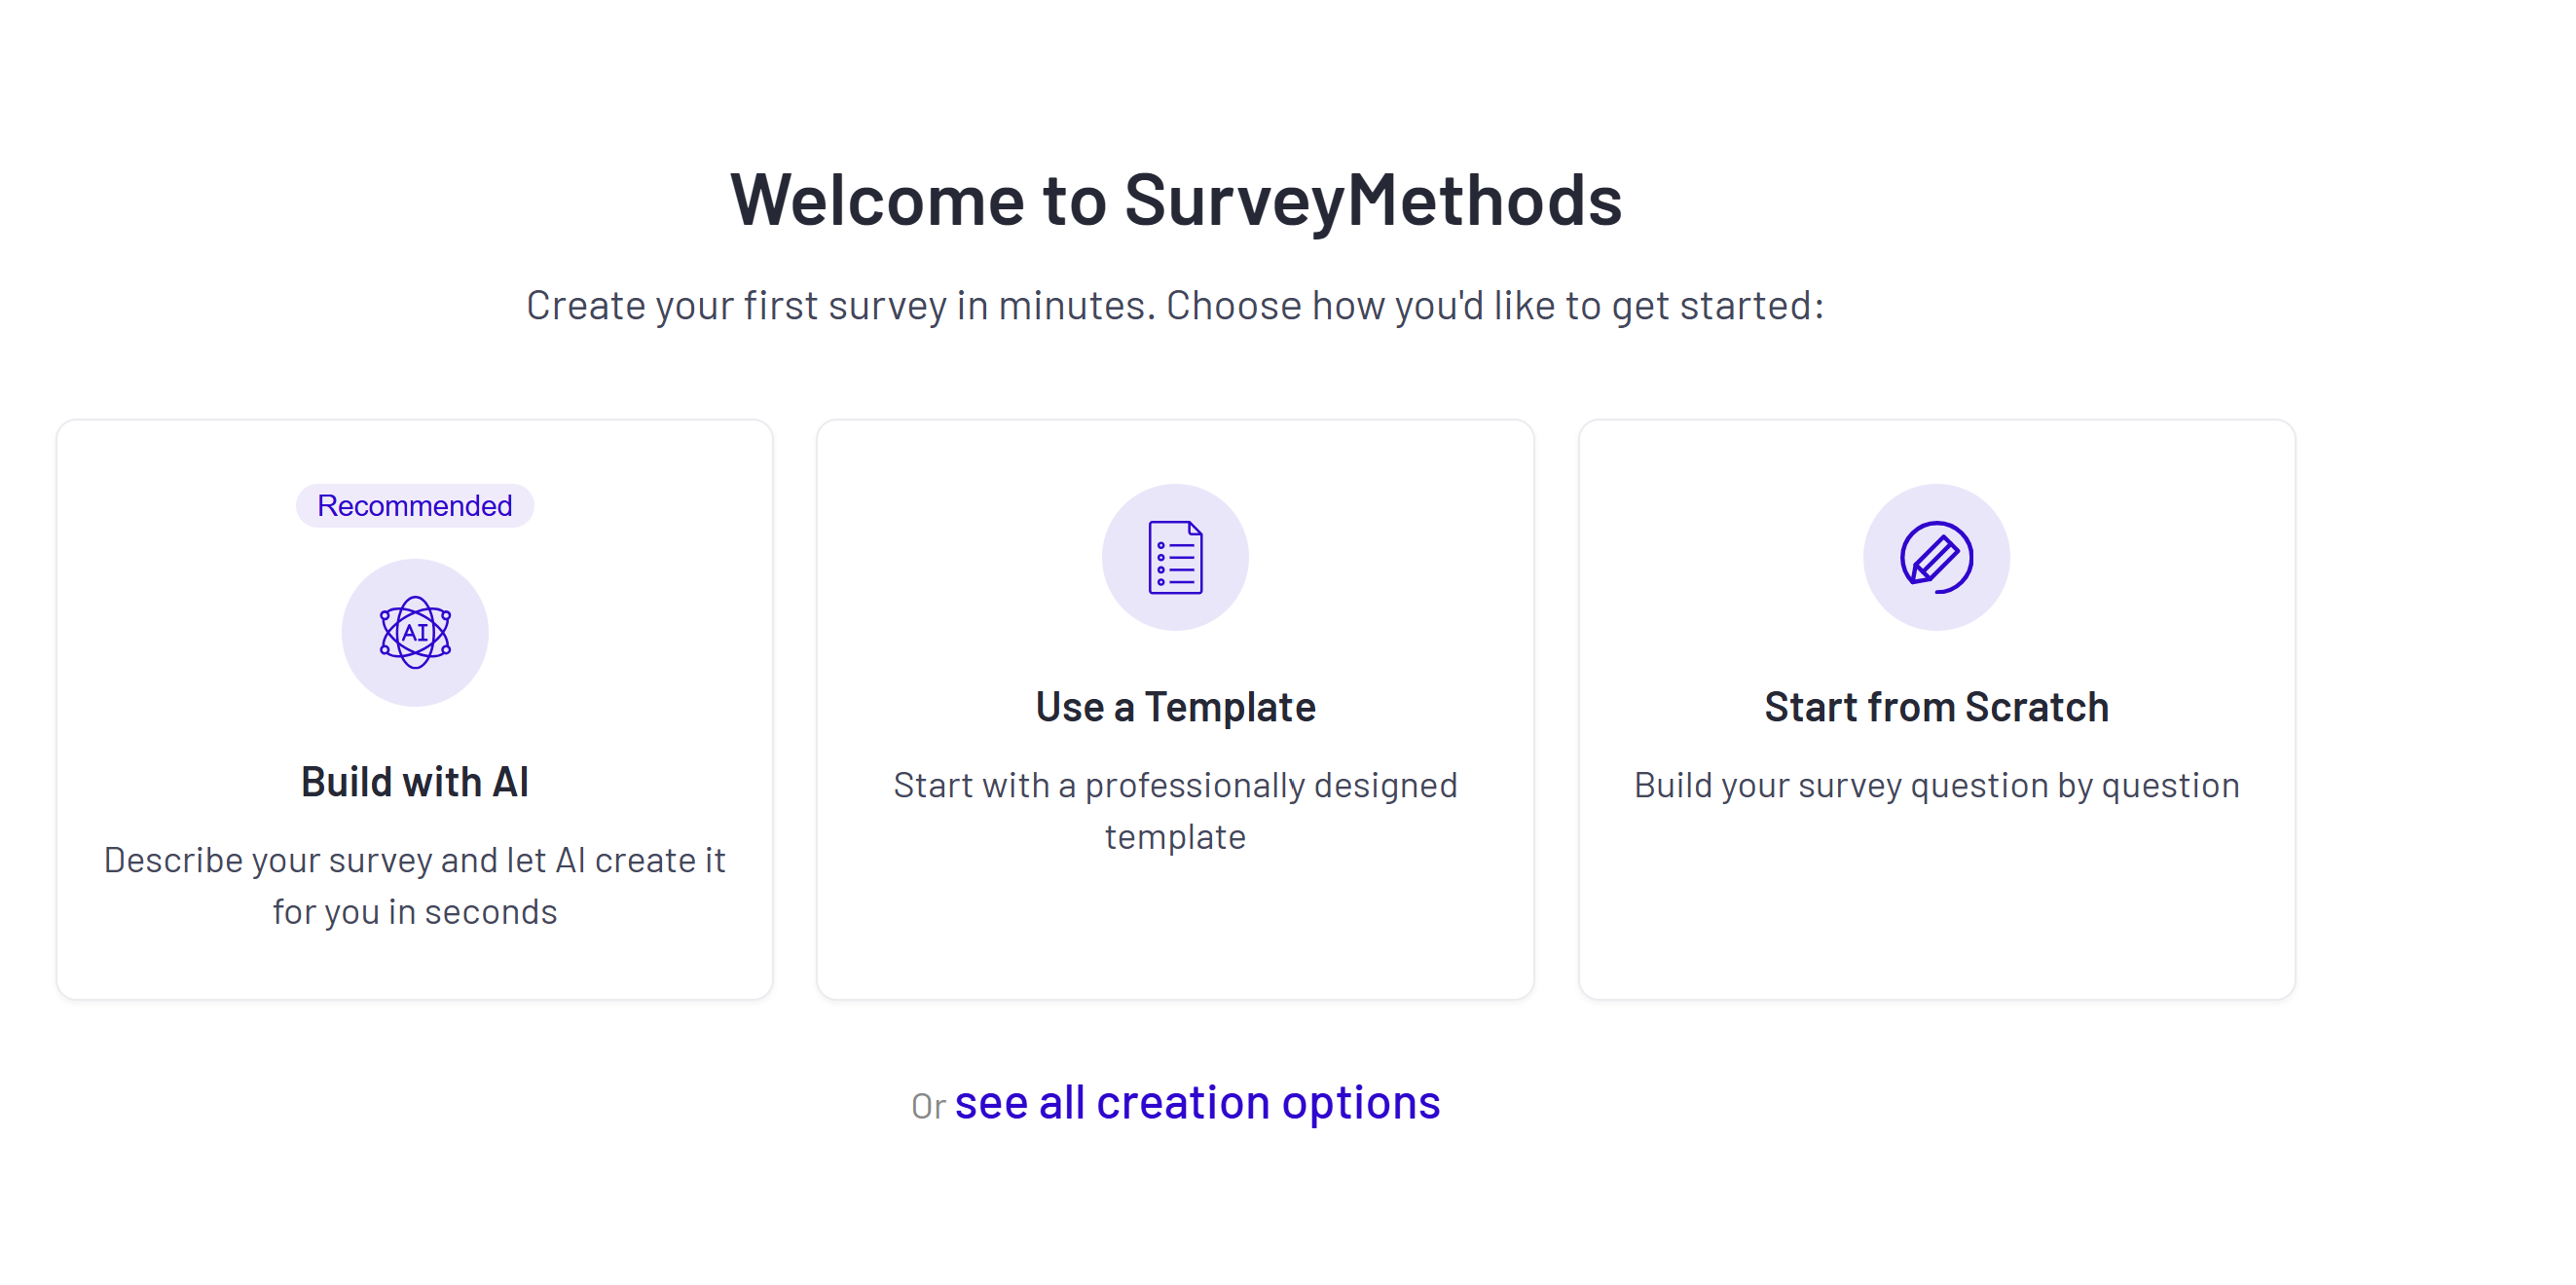
After logging in, you’ll land on your Survey Home dashboard. From here, if you have no surveys, you should see the below. Otherwise, click the Create Survey button in the top right corner.
Choose Your Creation Method
SurveyMethods offers five ways to create a survey. Click on any method below to learn more:
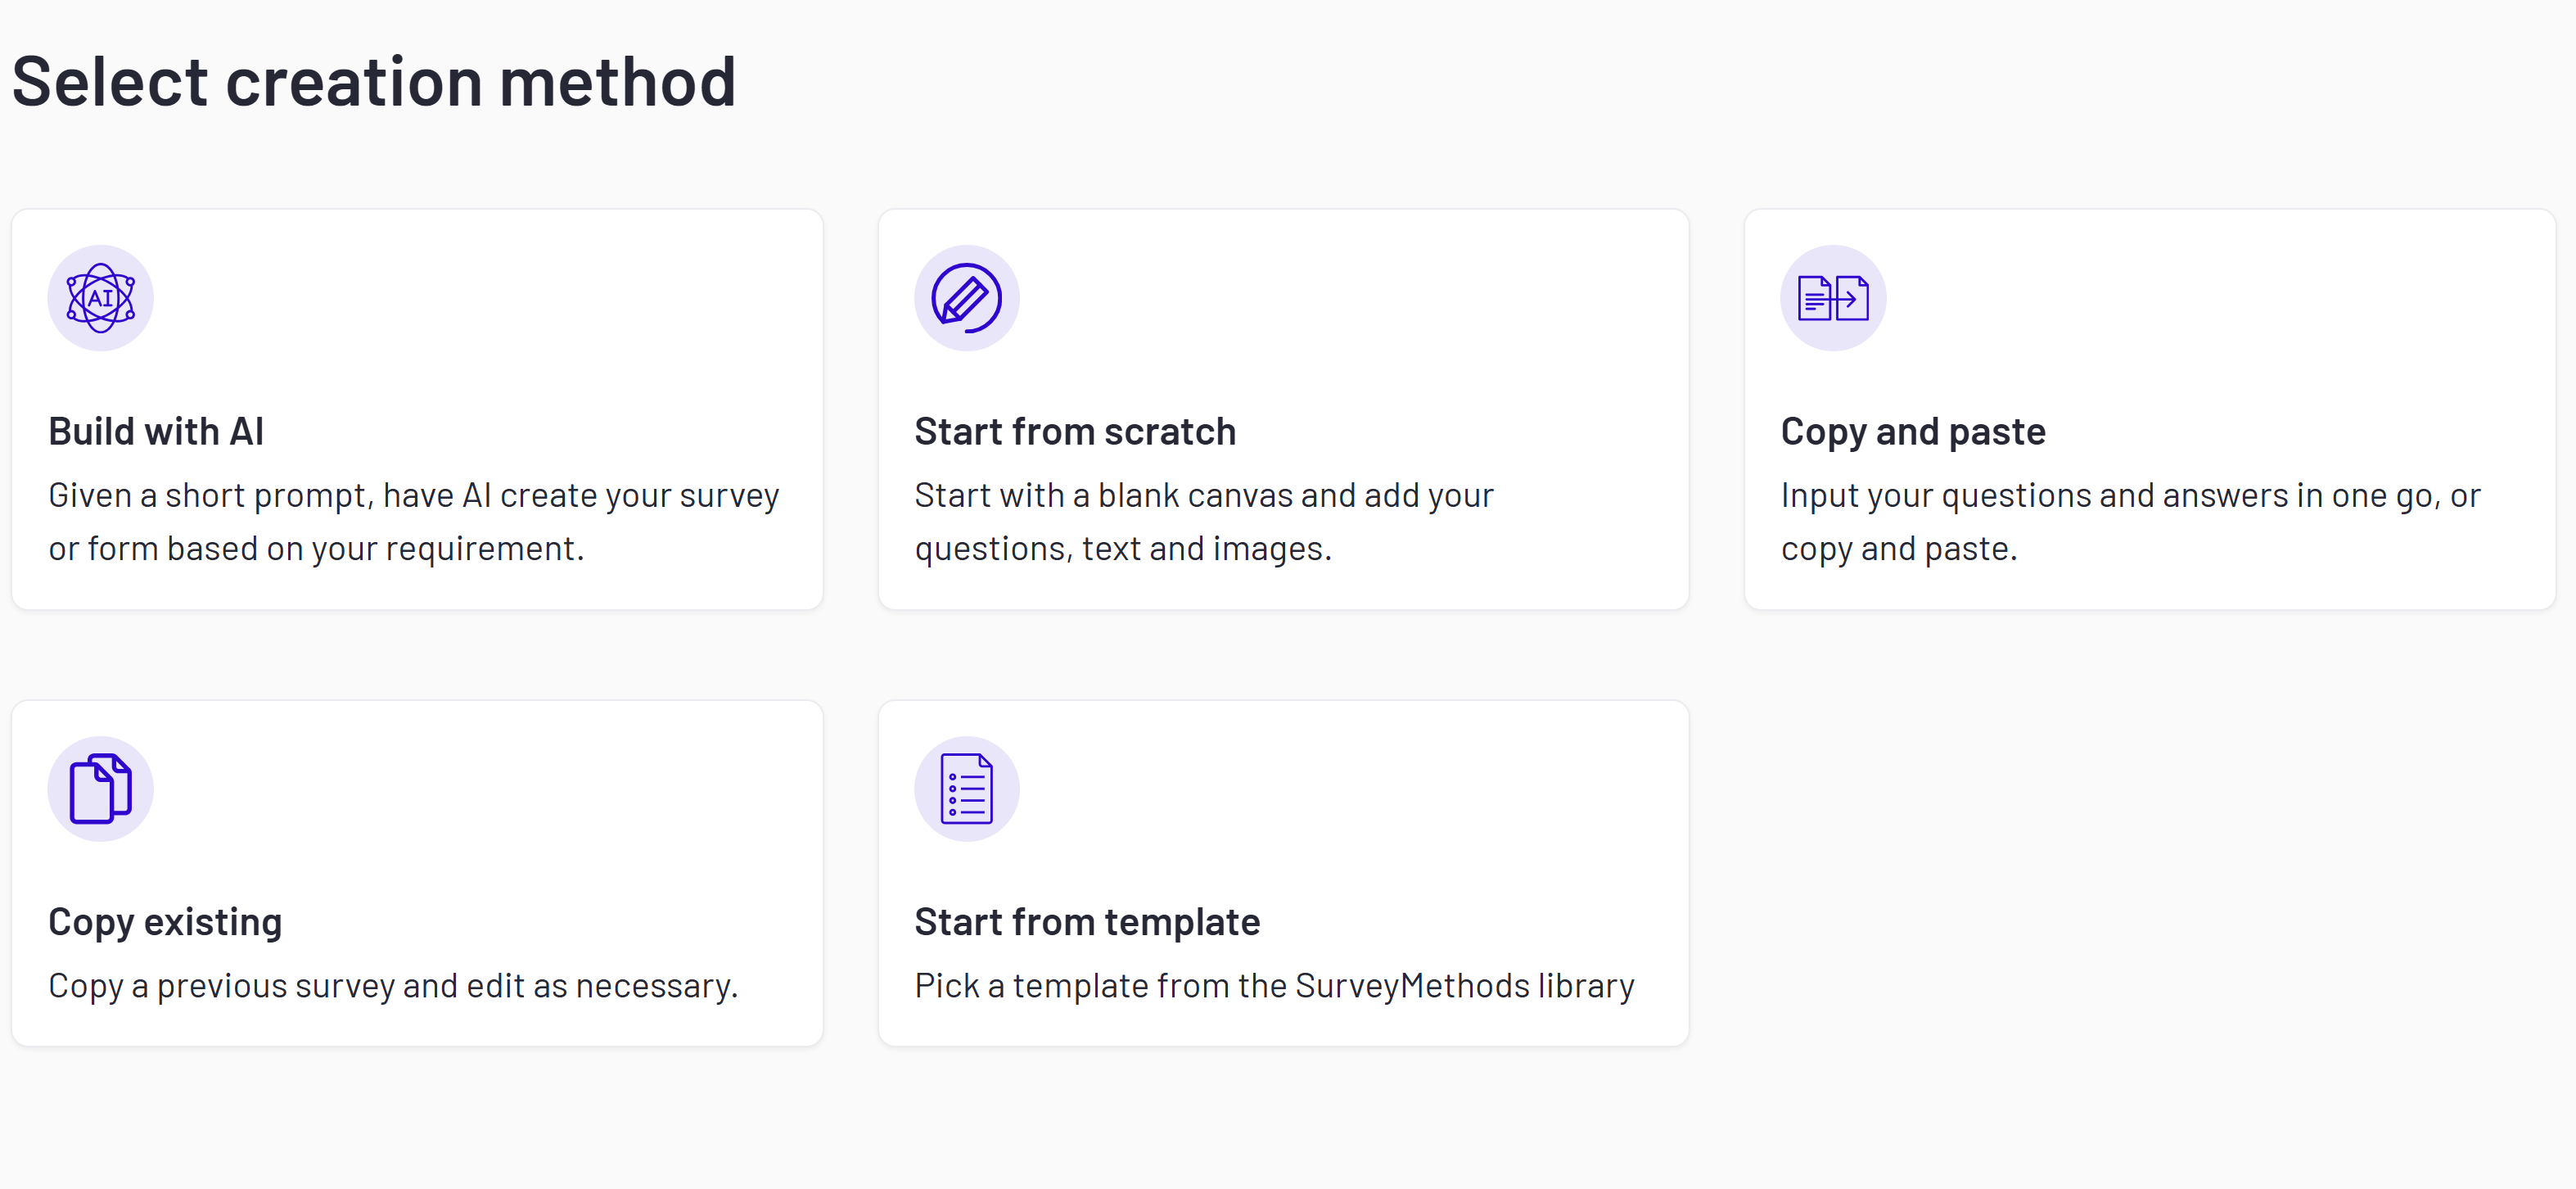
1. Start from Scratch
Begin with a blank canvas and build your survey question by question. Best for unique surveys that don’t fit standard templates.
2. Build with AI
Enter a description of what you want to survey, and our AI will generate a complete survey structure for you. You can then customize and refine it.
Example prompts:
- “Customer satisfaction survey for a software product”
- “Employee engagement survey with 10 questions”
- “Event feedback form for a conference”
3. Copy & Paste Questions
Paste your questions directly and SurveyMethods will automatically parse them into survey format.
4. Copy an Existing Survey
Duplicate one of your previous surveys and modify it for a new use case. Great for recurring surveys.
5. Start from a Template
Browse our template library organized by category (HR, Customer Experience, Education, etc.) and customize a pre-built survey.
Adding Questions
Once you’ve created your survey, you’ll enter the Survey Editor. Here’s how to add questions:
- Click Add Question or the + button
- Select your question type (see below)
- Enter your question text
- Add answer options (for applicable question types)
- Configure question settings (required, randomize options, etc.)
Question Types Available
Click on any question type to learn more about its features and best practices:
| Question Type | Description |
|---|---|
| Multiple Choice | Single selection from a list of options |
| Checkboxes | Allow multiple selections from options |
| Image Choice | Let respondents select from visual image options |
| Star Rating | Visual rating scale with stars |
| Slider | Select a value by dragging along a scale |
| Dropdown | Select from a dropdown menu |
| Matrix/Rating Scale | Grid-based rating questions |
| Matrix Dropdown | Grid with dropdown selections |
| File Upload | Allow respondents to upload files |
| Ranking | Drag to rank items in order |
| Net Promoter Score (NPS) | Industry-standard loyalty metric (0-10) |
| Comments Box | Open-ended text responses |
| Single Textbox | Short text input |
| Name | Collect respondent names |
| Collect and validate email addresses | |
| Phone | Collect and validate phone numbers |
| Text Block | Add instructions or context (non-question) |
| Image Element | Include visuals in your survey |
For a complete overview, see Question Types Overview.
Organizing Your Survey
Pages
Break your survey into multiple pages to improve the respondent experience. Click New Page to create sections.
Reordering
Drag and drop questions to reorder them within a page, or move them between pages.
Skip Logic
Use skip logic to direct respondents to different pages or questions based on their answers.
Next Steps
Once you’ve added your questions:
- Preview your survey to see it as respondents will
- Apply a theme to match your branding
- Configure settings like response limits and access control
- Distribute via email, web link, or embedded on your website
Tips for Better Surveys
- Keep surveys concise - aim for 5-10 minutes completion time
- Use clear, unbiased question wording
- Make important questions required
- Use skip logic to skip irrelevant sections
- Test your survey before sending
Need help? Contact our support team or browse more articles in the Survey Creation section.
Was this article helpful?